In this article we are connecting a Tasmota Based Devices to Nimbus808 solution platform using MQTT.
Requirements
- An ESP32, ESP8266 or any other device based on those two chips with an up-to-date Tasmota firmware flashed version
- A wireless internet connection
- A DHT-11 or DHT-22 sensor
- A DS18B20 sensor
- Jumper wires
Configure the GPIOs for the sensors
This article assumes that you already have an ESP device running Tasmota firmware. You can learn how to flash Tasmota to your device in a couple of minutes by following this guide.
First of all, we’ll need to go into our device’s dashboard and, in order to do so, we need to know its IP address on the local Wi-Fi network. If you don’t remember its IP address, you can get to know it by doing the following:
If you are running any Linux distribution, you can open your command console and type the command “ip addr”. This command will let you know your IP address, with which you can inspect the devices connected to your local network. After running the command, the following information will be displayed:
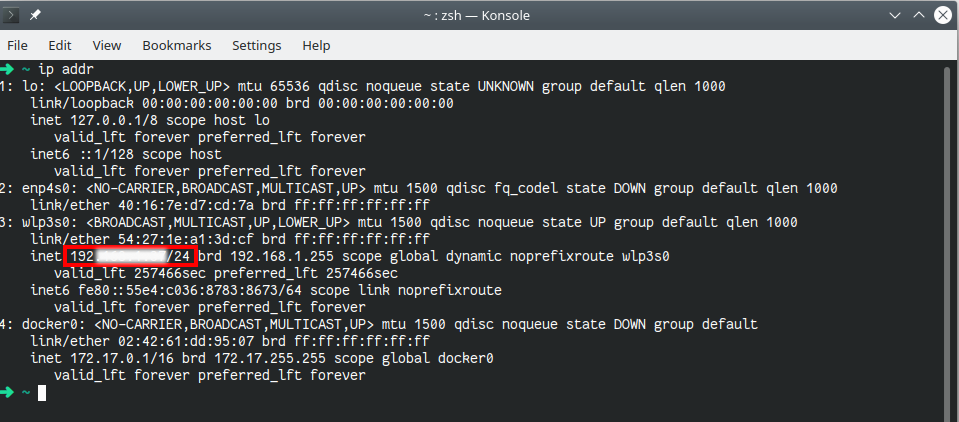
Your PC’s wireless interface information is listed under wlp3s0. The number enclosed in the red box is your IP address and your subnet mask. We’ll use that number to scan the devices in our local network, so copy it.
Now, in the same command console let’s run the following command replacing <your-ip-address> by the number that you copied in the previous step.
sudo nmap -sn <your-ip-address>After running the command, a list of devices on your local network will appear. Look for a device named Espressif or similar.
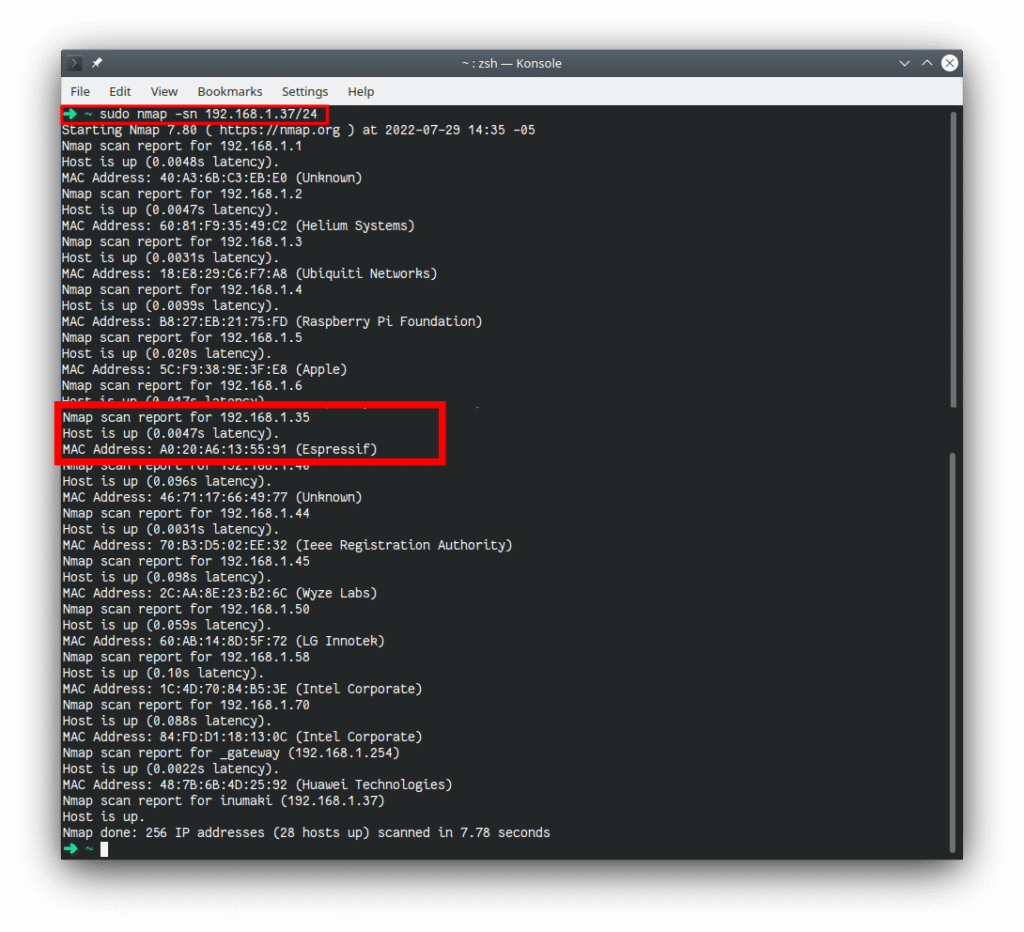
Pro tip: If you do not have “nmap” utility installed, you can do so by running “sudo apt install nmap”. It takes only a couple of seconds!
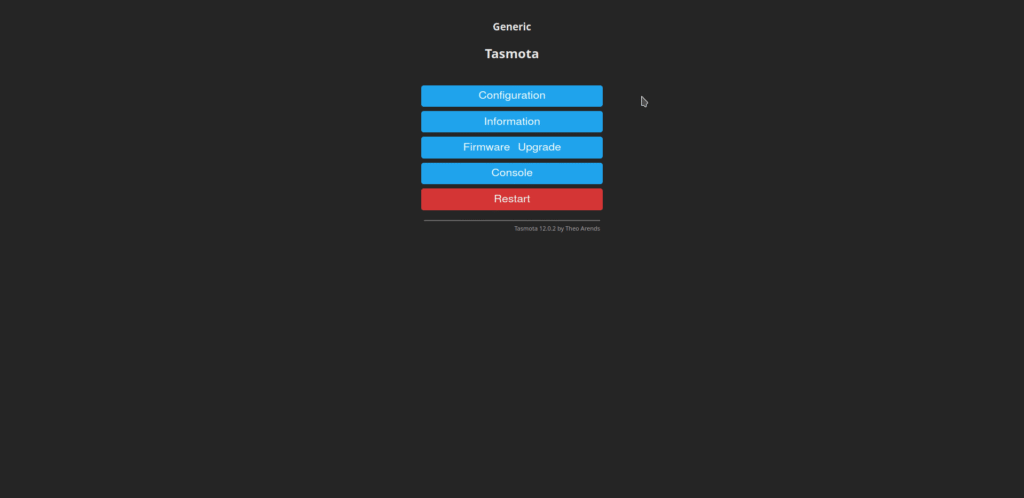
Now that you know your device’s IP address, you can head to its Tasmota dashboard by using your web browser to go to the address you just got. The device used in this guide is assigned the IP address 192.168.1.35. Entering this into a browser will display the following screen:
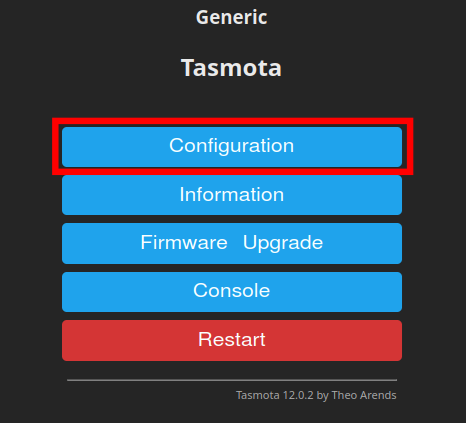
Now, here’s where the actual GPIO configuration takes place. Please click on the “Configuration” option and the following page will load in your web browser:
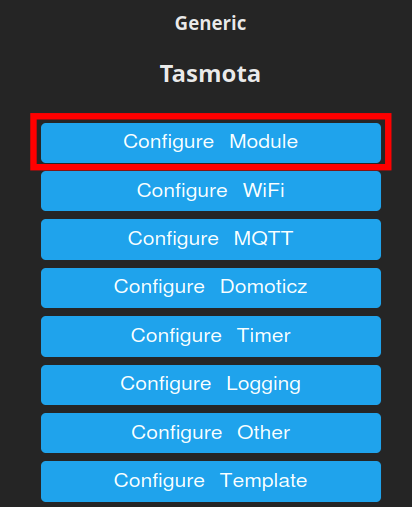
Click on “Configure Module” to proceed to the next configuration step. A new screen will appear, showing all configuration options for the device type, including the supported GPIO functions and sensors in Tasmota. Today we will be working with two different sensors to stream data to Ubidots. The following GIF shows you how to configure the GPIOs for those sensors:
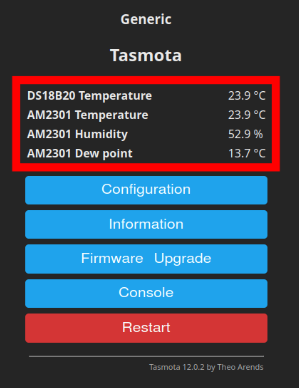
After configuring the GPIOs, the dashboard’s main page will display the following data:
Configure MQTT Parameters to Establish Connection with Nimbus808
With the data ready for ingestion, configure the MQTT connection to stream it to Nimbus808. To do so, head over to the “Configuration” option in the dashboard’s main page, and then, on the newly loaded screen, go to “Configure MQTT”. The following screen will appear:
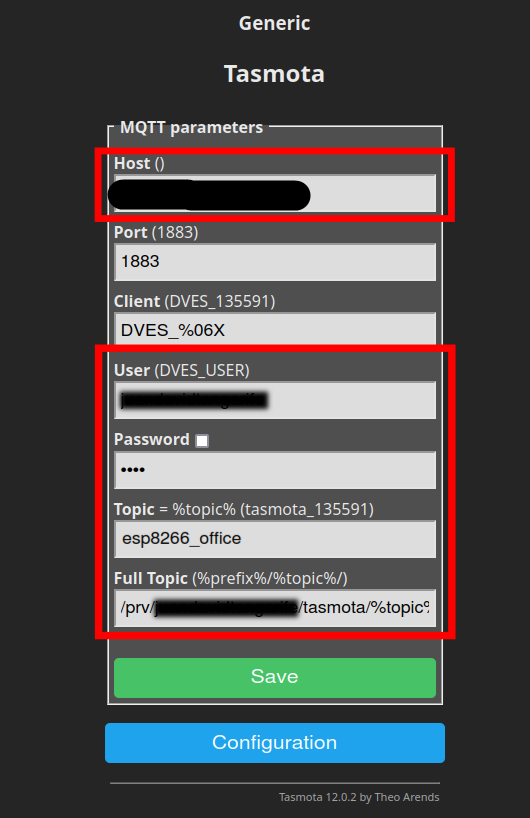
We only need to configure the parameters enclosed in the red boxes. Be careful doing this: typing mistakes here will invalidate any further step and will only be noticeable at the end, when no data reaches Nimbus808. Configure the parameters shown in the image above as follows:
- Host: Type “functions.nimbus808.com”.This is the endpoint that the MQTT protocol will publish into when streaming data.
- Port: Leave it on its default value.
- Client: Leave it on its default value.
- User: optional.
- Password: optional.
- Topic: This is up to you and depends on what suits your implementation. However, in this article we’ll use an identifier for the device type as topic, “esp8266_office”. The reason will be clear soon.
- Full Topic: Delete all the content of this field, and then type the following: /prv/your-username/tasmota/%topic%/. For example, if your Ubidots username is “johnDoe” then your Full Topic should be /prv/johndoe/tasmota/%topic%/
Have questions? Contact us for help