In this article we are connecting an Intel Edison device to Nimbus808 solution platform using MQTT.
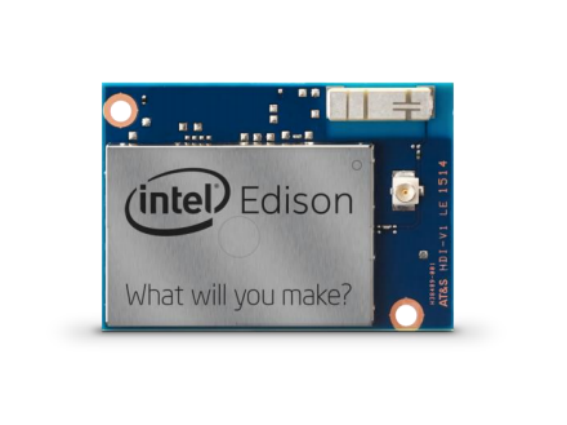
The Intel Edison is a compact computer-on-module designed by Intel for Internet of Things (IoT) applications. It features a dual-core Intel Quark x86 CPU running at 400 MHz and supports connectivity via Bluetooth and Wi-Fi.
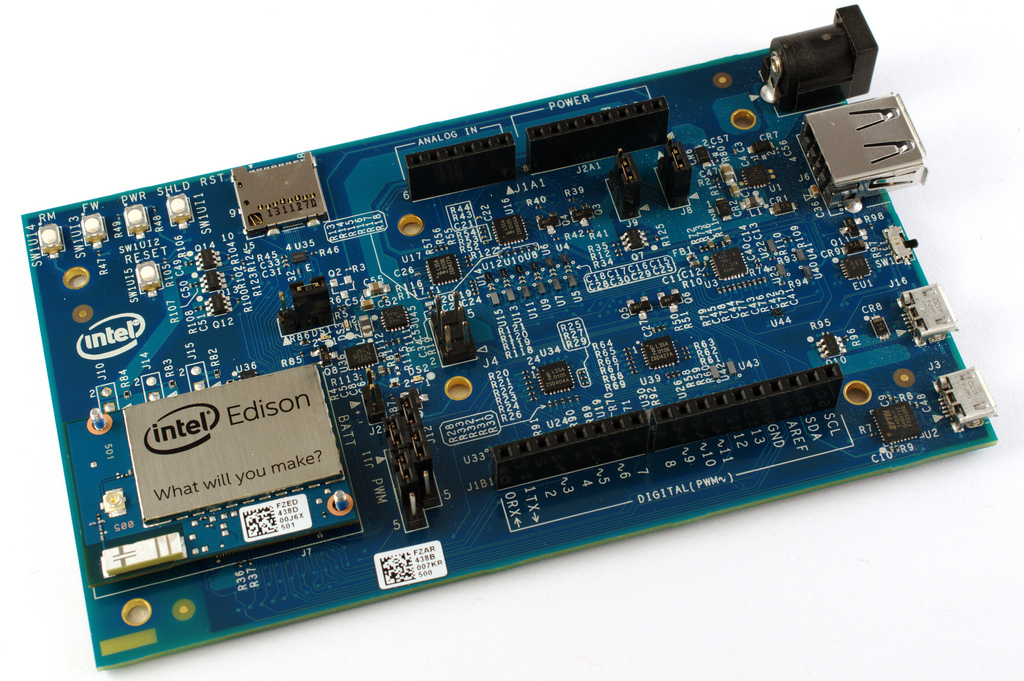
The Intel Edison provides an Arduino Kit with standard Arduino 1.0 pinouts and connectors, specifically designed for compatibility with hardware or software supporting the Arduino Uno R3 Shield.
Requirements
- Intel® Edison compute module
- Arduino* expansion board
- Micro-B USB to Standard-B USB cables (x 2)
- Direct current (DC) power supply
Setting up the Intel Edison
- Assemble the Intel Edison board according to the provided hardware instructions, ensuring all components and connectors are properly seated. With the following link you will find all the specifications to assemble your hardware properly.
- Download the latest configuration tool for your Operating System (OS) to access the features of the Intel® IoT Developer Kit.
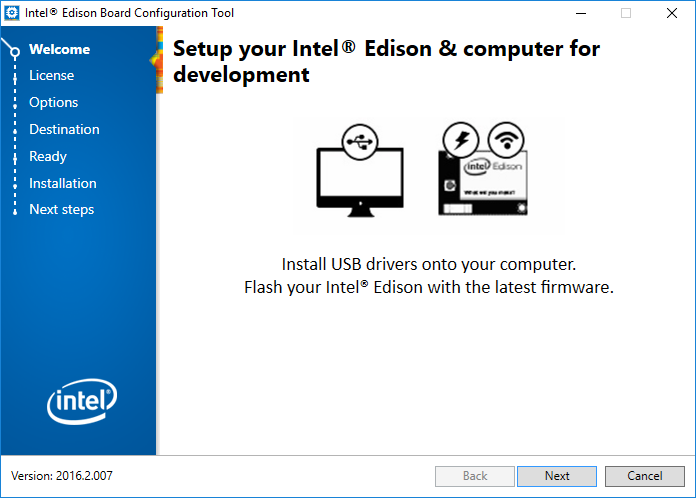
- Accept the license terms and follow the step-by-step instructions provided by the configuration tool to complete the setup.
- Install the USB drivers.

- Download the latest firmware and flash it to your Intel Edison. The process may take several minutes; please allow sufficient time for completion.
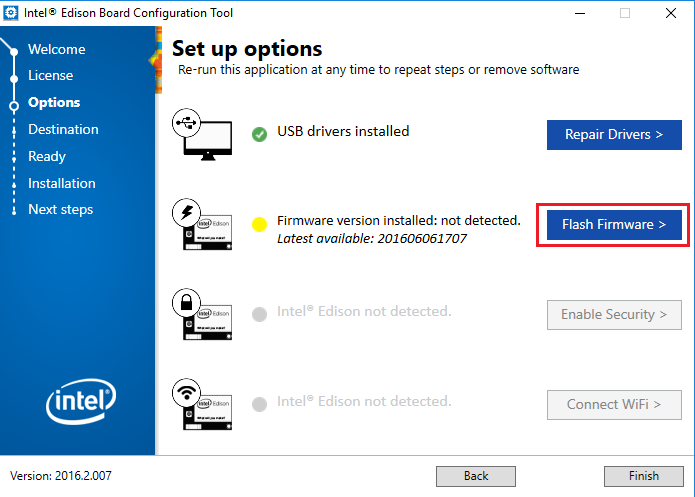
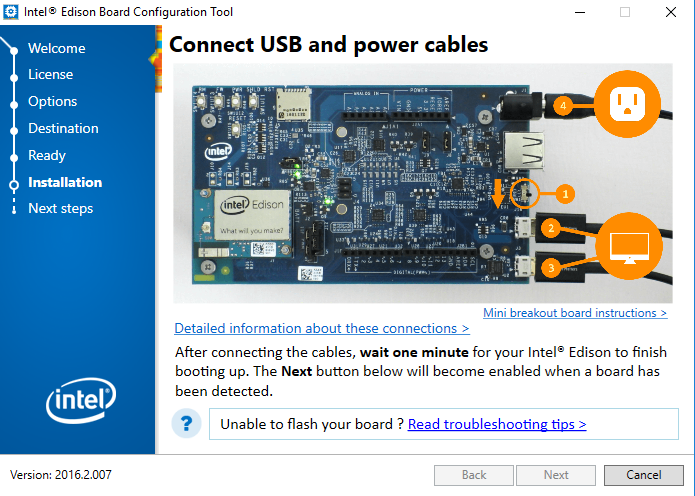
- After the download completes, the window below should appear. Ensure the Intel Edison board is correctly connected to your PC and powered to allow the flash process and subsequent reboot.
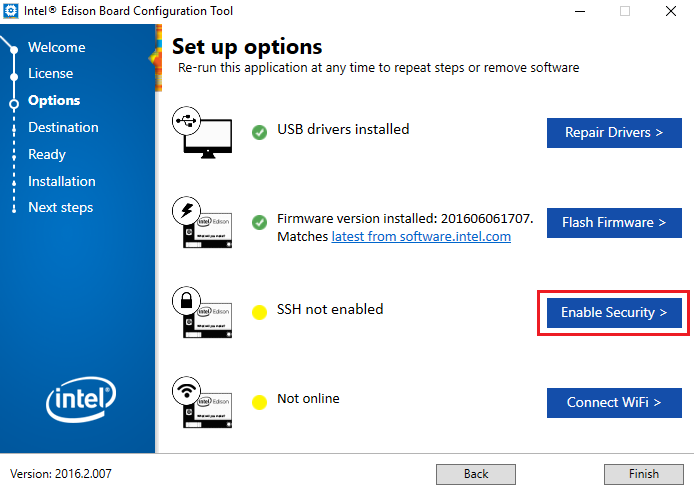
- Assign a device name and password to enable SSH access. No additional guide is required; simply follow the on-screen instructions.
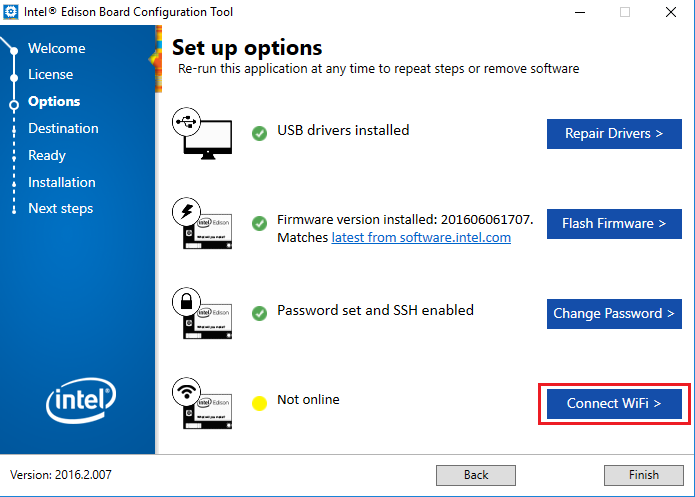
- Connect your Intel Edison board to a Wi-Fi network. The board will scan and display all available networks. Select the desired network, specify its security type, and enter the corresponding Wi-Fi credentials. If you modify any Wi-Fi settings, record them for future reference.
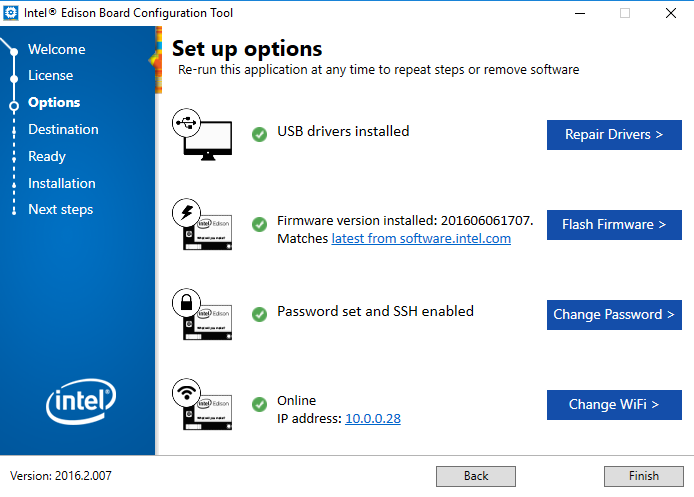
- Once your device is connected to the network, you will be provided with the IP address of the device.
- Verify that all configurations are checked, and therefore completed. Click on the “Finish” button once confirmed.
Setting up Arduino IDE
- Open the Arduino IDE, if you don’t have the IDE you can quickly download the latest version of Arduino’s IDE here.
- To use the Intel Edison platform in the Arduino IDE, install the Intel board package via the preconfigured Arduino Board Manager.
- Once the Intel platform is installed, select the specific device you are using—in this case, Intel Edison. In the Arduino IDE, navigate to Tools > Board > Intel Edison. Then, select the board and assign the corresponding COM port detected by your system.
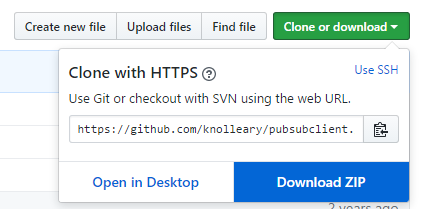
- Download and install the PubSubClient library. The library can be found in the following link.
Sending Data to Nimbus808
With the following sample code you will be able to post readings taken from ANALOG pins A0 and A1 of the Intel Edison Arduino Kit to your Nimbus808 account.
- To post your first value in Nimbus808, open the Arduino IDE and paste the sample code below. Once you have pasted the code, you will need to assign your Nimbus808 Broker, SSID (WiFi Name), and the Password of the available network.
/****************************************
 * Include Libraries
 ****************************************/
#include <PubSubClient.h>
#include <SPI.h>
#include <WiFi.h>

/****************************************
 * Define Your Wi-Fi crendetials
 ****************************************/
char ssid[] = "xxxxx"; //  Your network SSID (name)
char password[] = "xxxxx";    // Your network password (use for WPA, or use as key for WEP)

/****************************************
 * Define Constants
 ****************************************/
#define DEVICE_LABEL "edison" // Your device label
#define VARIABLE_LABEL_1 "sensor-1"// Your variable label (1)
#define VARIABLE_LABEL_2 "sensor-2"// Your variable label (2)

#define MQTT_SERVER "nimbus808.com"
#define sensor1 A0
#define sensor2 A1
#define RELAY 3

char topic[150];

float sensorValue1;
float sensorValue2;

WiFiClient wifiClient;
PubSubClient client(wifiClient);

/****************************************
 * Auxiliar Functions
 ****************************************/
void callback(char* topic, byte* payload, unsigned int length) {
  Serial.print("Message arrived [");
  Serial.print(topic);
  Serial.print("] ");
  for (int i=0;i<length;i++) {
    Serial.print((char)payload[i]);
  }
}

void reconnect() {
  // Loop until we're reconnected
  while (!client.connected()) {
    Serial.println("Attempting MQTT connection...");
    // Attempt to connect
    if (client.connect("intel-edison", "","")) {
      Serial.println("connected");
    } else {
      Serial.print("failed, rc=");
      Serial.print(client.state());
      Serial.println(" try again in 2 seconds");
      // Wait 2 seconds before retrying
      delay(2000);
    }
  }
}

/****************************************
 * Main Functions
 ****************************************/
void setup() {
    Serial.begin(115200);
    pinMode(sensor1, INPUT);
    pinMode(sensor2, INPUT);
    pinMode(RELAY, OUTPUT);
    delay(10);

     // We start by connecting to a WiFi network
    Serial.println();
    Serial.print("Connecting to ");
    Serial.println(ssid);

    WiFi.begin(ssid, password);

    while (WiFi.status() != WL_CONNECTED) {
      delay(500);
      Serial.print(".");
    }

    Serial.println("");
    Serial.println("WiFi connected");
    Serial.println("IP address: ");
    Serial.println(WiFi.localIP());
    client.setServer(MQTT_SERVER, 1883);
    client.setCallback(callback);
    sprintf(topic, "%s%s", "/v1.6/devices/", DEVICE_LABEL);

}

void loop() {
    if (!client.connected()) {
      reconnect();
    }
    char* payload = (char *) malloc(sizeof(char) * 100);
    sensorValue1 = analogRead(sensor1);
    sensorValue2 = analogRead(sensor2);

    sprintf(payload, "{\"%s\": %f}", VARIABLE_LABEL_1, sensorValue1);
    client.publish(topic, payload);
    //Serial.println((topic, payload));
    Serial.print("Sensor Value 1: ");
    Serial.println(sensorValue1);

    sprintf(payload, "{\"%s\": %f}", VARIABLE_LABEL_2, sensorValue2);
    client.publish(topic, payload);
    //Serial.println((topic, payload));
    Serial.print("Sensor Value 2: ");
    Serial.println(sensorValue2);

    free(payload);
    client.loop();
    delay(5000);
}- Verify your code within the Arduino IDE. To do this, in the top left corner of our Arduino IDE you will see the “Check Mark” icon; press it to verify your code.
- Upload the code into your “Intel Edison”. To do this, choose the “right-arrow” icon beside the “check mark” icon.
- To verify the connectivity of the device and the data sent, open the serial monitor by selecting the “magnifying glass” icon in the top right corner of the Arduino IDE to see the connectivity logs.
- Confirm your data in Nimbus808. Now you should see the posted data in your Nimbus808 account, located the device called “edison”.
Receiving Data from Nimbus808
With the following sample code you will be able to subscribe to a value from Nimbus808 to start controlling any asset you desire.
- To begin receiving values from Nimbus808, open the Arduino IDE and paste the sample code below. Once you have pasted the code, be sure to assign the following parameters:
- SSID (WiFi Name) & Password of the available network connection.
- Nimbus808 Broker
- Device Label of the device which contains the variable to want to GET.
- Variable Label of the variable you want to GET
/****************************************
 * Include Libraries
 ****************************************/
#include <PubSubClient.h>
#include <SPI.h>
#include <WiFi.h>

/****************************************
 * Define Your Wi-Fi crendetials
 ****************************************/
char ssid[] = "xxxxx"; //  Your network SSID (name)
char password[] = "xxxxx";    // Your network password (use for WPA, or use as key for WEP)

/****************************************
 * Define Constants
 ****************************************/
#define DEVICE_LABEL "edison" // Your device label
#define VAR_SUBSCRIBE "relay" // Your variable label for subscribing
#define MQTT_SERVER "nimbus808.com"
#define RELAY 3

char topic[150];

WiFiClient wifiClient;
PubSubClient client(wifiClient);

/****************************************
 * Auxiliar Functions
 ****************************************/
void callback(char* topic, byte* payload, unsigned int length) {
  Serial.print("Message arrived [");
  Serial.print(topic);
  Serial.print("] ");
  for (int i=0;i<length;i++) {
    Serial.print((char)payload[i]);
  }
  if ((char)payload[0]=='1'){
    digitalWrite(RELAY, HIGH);
  }
  else{
    digitalWrite(RELAY, LOW);
  }
}

void reconnect() {
  // Loop until we're reconnected
  while (!client.connected()) {
    Serial.println("Attempting MQTT connection...");
    // Attempt to connect
    if (client.connect("intel-edison", "","")) {
      Serial.println("connected");
      client.subscribe("/v1.6/devices/"DEVICE_LABEL"/"VAR_SUBSCRIBE"/lv");
    } else {
      Serial.print("failed, rc=");
      Serial.print(client.state());
      Serial.println(" try again in 2 seconds");
      // Wait 2 seconds before retrying
      delay(2000);
    }
  }
}

/****************************************
 * Main Functions
 ****************************************/
void setup() {
    Serial.begin(115200);
    pinMode(RELAY, OUTPUT);
    delay(10);

     // We start by connecting to a WiFi network
    Serial.println();
    Serial.print("Connecting to ");
    Serial.println(ssid);

    WiFi.begin(ssid, password);

    while (WiFi.status() != WL_CONNECTED) {
      delay(500);
      Serial.print(".");
    }
    Serial.println("");
    Serial.println("WiFi connected");
    Serial.println("IP address: ");
    Serial.println(WiFi.localIP());
    client.setServer(MQTT_SERVER, 1883);
    client.setCallback(callback);
    sprintf(topic, "%s%s", "/v1.6/devices/", DEVICE_LABEL);
    client.subscribe("/v1.6/devices/"DEVICE_LABEL"/"VAR_SUBSCRIBE"/lv");

}

void loop() {
    if (!client.connected()) {
      reconnect();
      client.subscribe("/v1.6/devices/"DEVICE_LABEL"/"VAR_SUBSCRIBE"/lv");
    }
    client.loop();
}- Verify & Upload the code into the board following the same steps provided in the PUBLISH step above.
- To verify the connectivity of the device and the data which is being received, open the serial monitor by selecting the “magnifying glass” icon in the top right corner of the Arduino IDE to see the connectivity logs.
- In the serial monitor, you will be able to see the last value received in Nimbus808 of the variable specified in the firmware.
Summary
With this simple tutorial you are able to send and receive data to/from Nimbus808 with the ease of the Arduino IDE and an Intel Edison.
Have questions? Contact us for help