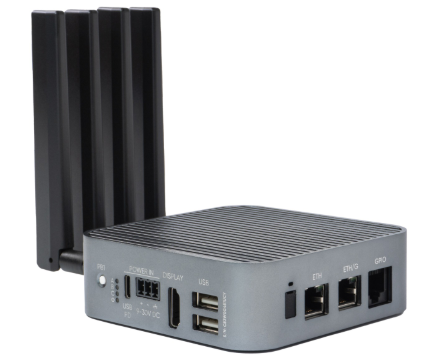
In this article we are connecting ALPON Edge Computers to Nimbus808 solution platform using MQTT.
Learn how to set up the ALPON Edge Computers to send/receive data over Nimbus808
Requirements:
- ALPON Edge Computers
- Nimbus808 Account
- Sixfab Connect Account
- Docker
This guide assumes that you have internet access on your ALPON Edge Computers.
Step 1: Create the Docker Image
To ensure that our script runs consistently across different environments, we will use Docker to package it. Follow these steps to create a Dockerfile:
- Open a terminal and create a new directory for your project.
- Inside the directory, create a new file called
Dockerfileand add the following content:
Dockerfile
FROM python:3.11-slim

RUN pip install --no-cache-dir paho-mqtt

WORKDIR /app

COPY send_to_nimbus.py .

CMD ["python", "send_to_nimbus.py"]
This file tells Docker to:
- Use a lightweight Python 3.11 image
- Install the MQTT library (
paho-mqtt) - Set up a working directory
- Copy our Python script into the container
- Run the script when the container starts
Step 2: Writing the MQTT Client Script
Now, let’s create the Python script that will send data to Nimbus.
- In the same directory as your
Dockerfile, create a new file called send_to_nimbus.py. - Copy and paste the following code into the file:
Python
import time
import os
from paho.mqtt import client as mqtt_client

broker = 'nimbus808.com'
port = 1883
topic = f"/v1.6/devices/{os.getenv('DEVICE_NAME', 'default_device_name')}"
client_id = "aplon_x4_client"
username = ""
password = ""

def connect_mqtt():
    def on_connect(client, userdata, flags, rc):
        if rc == 0:
            print("Connected to MQTT Broker!")
        else:
            print(f"Failed to connect, return code {rc}\n")

    client = mqtt_client.Client(client_id)
    client.username_pw_set(username, password)
    client.on_connect = on_connect
    client.connect(broker, port)
    return client

def publish(client):
    while True:
        time.sleep(2)
        msg = '{"temperature": 25, "humidity": 60}'
        result = client.publish(topic, msg)
        status = result[0]
        if status == 0:
            print(f"Sent: `{msg}`")
        else:
            print(f"Failed to send message to topic {topic}")

def run():
    client = connect_mqtt()
    client.loop_start()
    publish(client)

if __name__ == '__main__':
    run()
This script will:
- Connect to the Nimbus808 MQTT broker
- Continuously send temperature and humidity data every 2 seconds
- Print a message each time data is successfully sent
Step 3: Build and Push the Container to Sixfab Registry
After setting up the Dockerfile, use Docker’s build command to create the container image.
To deploy the container on ALPON X4, the image must be built on your personal computer for the ARM64 architecture.
Shell
docker buildx build --platform=linux/arm64 -t nimbus808-mqtt-client:latest .This will create an image named nimbus808-mqtt-client, optimized for the ALPON X4’s ARM64 architecture.
Push to Sixfab Registry:
- Log in to the Sixfab Connect platform, navigate to the Sixfab Registry page
- Click on + Add Container and follow the prompts to push container to Sixfab registry.
Step 4: Deployment
Once the container image is uploaded to the Sixfab Connect registry, deploy it as follows:
- Go to the Application section of your asset on Sixfab Connect.
- Click the + Deploy button to configure and deploy the container.
- In the Deploy Container window, use the following settings:
- Container Name: Enter the application name (e.g., “nimbus808-mqtt-client”).
- Image: Select the Ubidots container image and tag pushed to the Sixfab Registry.
- Environment: Click “+ Add More” in the environment section and add the following values:
KeyValue DEVICE_NAME<your-device-name-here> - Click the “+ Deploy” button to start running the container on ALPON X4.