First select the appropriate device from the Device Table. The Tags table will change depending on the device selected.
In the Tags table, select the pencil icon under the Edit column and in the row of the tag to be edited.

A new window will appear to edit the Tag’s name, description, and settings. Once your updates are done, click Edit Tag. Only authorized users can edit tags.
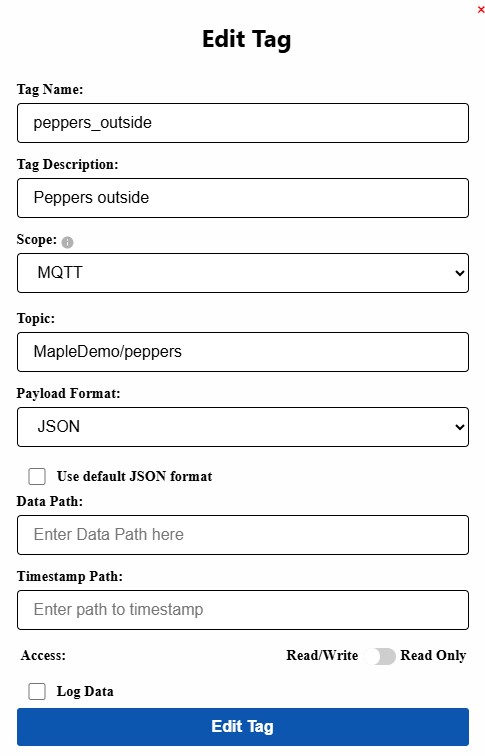
- Tag Name: Name if the tag.
- Tag Description: Description of the tag.
- Scope: Determines where the value applies/ is visible.
- Client scope means that the value only takes effect on the client. Each browser will get its own instance of the tag. Changing the value on one browser will not effect the value on a different browser.
- MQTT scope means that the value is shared by all MQTT clients. Changing the value tag in one client / browser will publish as update to the MQTT broker, any client subscribing to the tag will be updated with the new value.
- Topic: A topic should follow typical MQTT structure and be as descriptive as needed for the current project development.
- Payload Format:
- RAW
- JSON
- Data Path: This is a device specific setting, using the “use default format” is recommended unless your device is formatted differently.
- Timestamp Path: This is a device specific setting, using the “use default format” is recommended unless your device is formatted differently.
- Access: Ex: if you have a numeric widget with a read only tag assigned to it, then data will be displayed in it. If you try to click on it and type a number to send back to the same tag, it will not work. If it is set to read/write then any value typed into the box will also be sent back to the topic.
- Read/Write: Read/Write allows you to receive data as well as send.
- Read Only: Read Only means you can only receive data.
- Log Data: If this checkbox is checked, data be logged into the Nimbus808 database for historical viewing. The Trend widget is used to display historical data.