In this article we are connecting an BeagleBone Green Wireless device to Nimbus MQTT solution platform.
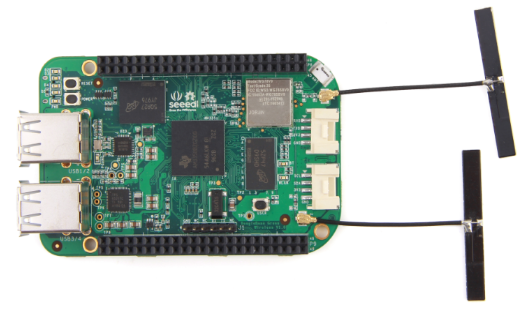
The BeagleBone Green Wireless is an IoT device featuring Wi-Fi and Bluetooth Low Energy (BLE) connectivity. Its wireless components support MIMO, enhancing data transmission speeds. The board includes a high-performance Wi-Fi/Bluetooth interface and two Grove connectors, simplifying integration with the extensive Grove sensor ecosystem.
In this guide, you will learn how to program the BeagleBone Green Wireless to connect to the Nimbus808 Cloud, enabling visualization, analysis, and transformation of raw data into actionable insights for your business.
Requirements
- BeageBone Green Wireless
- Micro USB to USB Cable
- Nimbus808 Account
Hardware Setup
- Connect your BeagleBone Green Wireless to your PC via the USB Port.
- BeagleBone will appear in your PC as an USB pendrive, goto and open the “BEAGLEBONE” folder.
- Click on the “DRIVERS” and select your OS (Operating System) and follow the on-screen guide to download and install the correct drivers needed for your OS.

- Now, let’s setup WiFi for the BeagleBone Green Wireless.
As an autonomous device, the BeagleBone Green Wireless will broadcast its own Wi-Fi network once the correct drivers are installed.
On your computer, scan for available Wi-Fi networks and select the network named BeagleBoneXXXXXX to establish a connection with your BeagleBone Green Wireless device.
NOTE: “XXXXXX” from BeagleBoneXXXXXX is the Beaglebone ID.
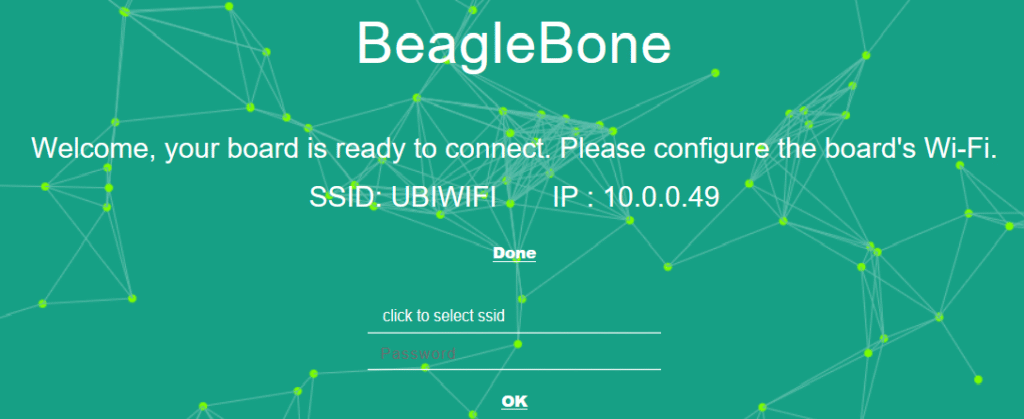
- Next, using Chrome or Firefox (Internet Explorer is not supported), navigate to http://192.168.7.2. The following page will load, providing access to your BeagleBone Green Wireless interface.
- Enter the WiFi SSID and its Password and click OK to complete your WiFi connection.
- If all steps have been correctly followed, your device will connect to the internet, and you will be directed to the BeagleBoard.org web interface to program and manage your BeagleBone Green Wireless.
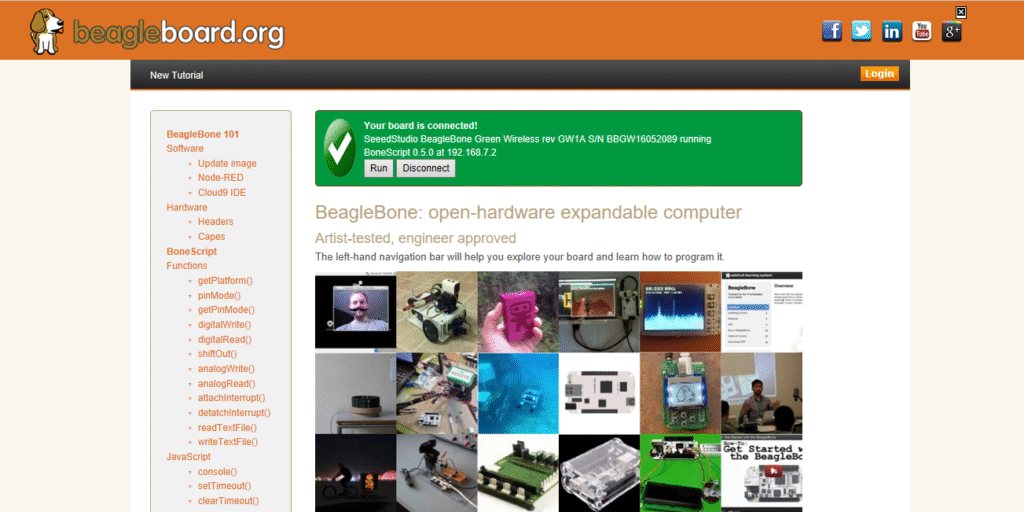
Now your BeagleBone Green Wireless is connected to the the WiFi network.
NOTICE: To verify if your device is connected you will see a display at the top of the BeagleBoard page like this:

Firmware Setup
To finalize the firmware setup and installation of your BeagleBone Green Wireless, we will use Node-RED, a programming tool developed by IBM. Node-RED supports hundreds of application logic mappings and data flow configurations for IoT and other systems.
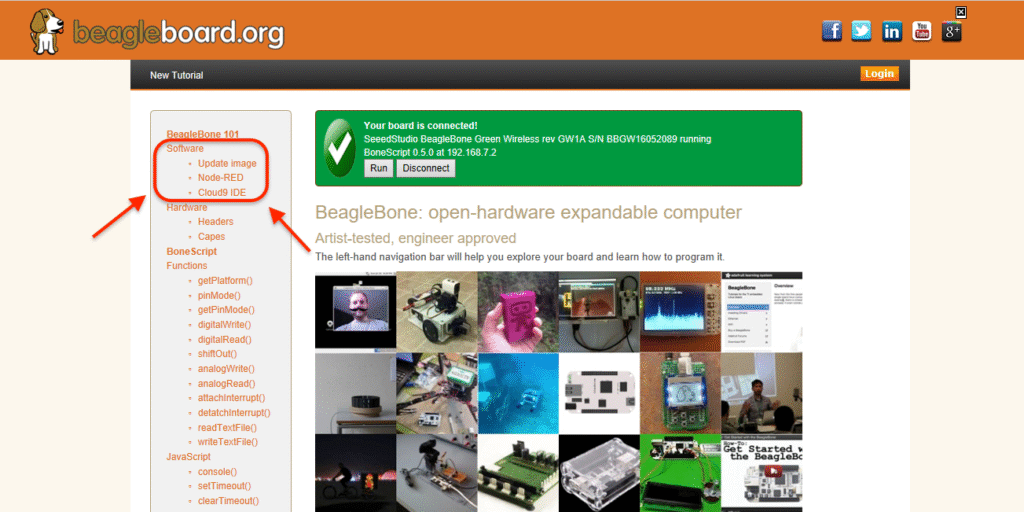
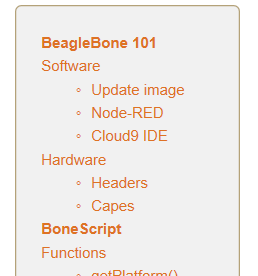
To access Node-RED, simply select the program from your web-based BeagleBoard.org control interface, as illustrated below.
Following the onscreen guide or by being a Node-Red pro, you can access to Node-RED by typing http://192.168.7.2:1880/ into your browsers URL.
Sending analog inputs
The easiest way to interact with Nimbus808 when working with analog inputs is using Node-RED.
IMPORTANT NOTE: Make sure your WiFi is setup to BeagleBone. If not, please refer to the Hardware Setup instructions previously provided in this tutorial.
- On the left-hand side of the BeagleBoard.org page, locate the Node-RED section. Click Node-RED to begin programming your device.
- You can access Node-RED either by following the on-screen guide or directly by entering http://192.168.7.2:1880/ in your browser’s URL bar.
- Once Node-RED opens in your browser, click the Node-RED menu in the upper-right corner, then select “Import” → “Clipboard”.
- Paste the code from your clipboard into the modal input area provided.
[
    {
        "id": "9672fbe6b72218d3",
        "type": "tab",
        "label": "Flow 1",
        "disabled": false,
        "info": "",
        "env": []
    },
    {
        "id": "2e149338.de9a7c",
        "type": "bbb-analogue-in",
        "z": "9672fbe6b72218d3",
        "pin": "P9_39",
        "topic": "",
        "breakpoints": [
            {
                "input": 0,
                "output": 0,
                "mutable": false
            },
            {
                "input": 1,
                "output": 1,
                "mutable": false
            }
        ],
        "averaging": false,
        "name": "Analog Pin 0",
        "x": 450,
        "y": 340,
        "wires": [
            [
                "e88cfc7f.28aec",
                "4c7bee83.16fa6"
            ]
        ]
    },
    {
        "id": "d688524c.45b9",
        "type": "inject",
        "z": "9672fbe6b72218d3",
        "name": "Reading Activation",
        "props": [
            {
                "p": "payload"
            },
            {
                "p": "topic",
                "vt": "str"
            }
        ],
        "repeat": "5",
        "crontab": "",
        "once": false,
        "onceDelay": "",
        "topic": "",
        "payload": "",
        "payloadType": "date",
        "x": 200,
        "y": 340,
        "wires": [
            []
        ]
    },
    {
        "id": "be8e1936.efc228",
        "type": "debug",
        "z": "9672fbe6b72218d3",
        "name": "",
        "active": false,
        "console": false,
        "complete": "false",
        "x": 918,
        "y": 462,
        "wires": []
    },
    {
        "id": "e88cfc7f.28aec",
        "type": "debug",
        "z": "9672fbe6b72218d3",
        "name": "",
        "active": false,
        "console": false,
        "complete": "false",
        "x": 691,
        "y": 465,
        "wires": []
    },
    {
        "id": "4c7bee83.16fa6",
        "type": "function",
        "z": "9672fbe6b72218d3",
        "name": "Parse Function",
        "func": "var response = {};\nresponse.payload = {\"temperature\": msg.payload};\nresponse.topic = \"/v1.6/devices/BeagleBone\";\nreturn response;",
        "outputs": 1,
        "noerr": 0,
        "x": 760,
        "y": 340,
        "wires": [
            [
                "be8e1936.efc228",
                "5251db484018455e"
            ]
        ]
    },
    {
        "id": "5251db484018455e",
        "type": "mqtt out",
        "z": "9672fbe6b72218d3",
        "name": "",
        "topic": "/BBB/Devices",
        "qos": "1",
        "retain": "true",
        "respTopic": "",
        "contentType": "",
        "userProps": "",
        "correl": "",
        "expiry": "",
        "broker": "4d0f46ac56dc4d74",
        "x": 980,
        "y": 320,
        "wires": []
    },
    {
        "id": "4d0f46ac56dc4d74",
        "type": "mqtt-broker",
        "name": "Nimbus808",
        "broker": "Nimbus808.com",
        "port": "1883",
        "clientid": "",
        "autoConnect": true,
        "usetls": false,
        "protocolVersion": 4,
        "keepalive": 60,
        "cleansession": true,
        "autoUnsubscribe": true,
        "birthTopic": "",
        "birthQos": "0",
        "birthRetain": "false",
        "birthPayload": "",
        "birthMsg": {},
        "closeTopic": "",
        "closeQos": "0",
        "closeRetain": "false",
        "closePayload": "",
        "closeMsg": {},
        "willTopic": "",
        "willQos": "0",
        "willRetain": "false",
        "willPayload": "",
        "willMsg": {},
        "userProps": "",
        "sessionExpiry": ""
    }
]
In the following steps 5 – 10 you will need to specify the following;
- Your Nimbus808 token
- The analog input to which you connect your sensor
- The label identifier of ‘Nimbus808 ’ data source and the label identifier of the variable.
Note: In this code, “BEAGLEBONE” is the device label, “TEMPERATURE” is the variable label, and “AIN0” corresponds to analog pin 0. If you haven’t installed the Nimbus808 nodes, follow the Node-RED library installation instructions above to add them.
- After you drop your flow onto the workspace, double-click “ANALOG PIN 0” to open and adjust the node.
- Then, within the analog pin 0 node, locate the “INPUT PIN” section and select the pin used in your device and click “OK”.
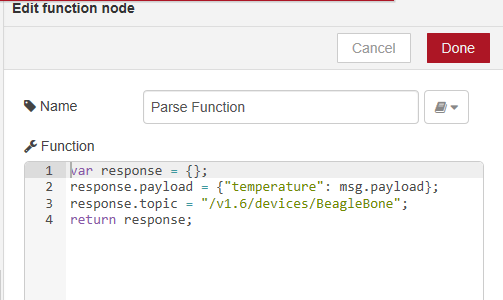
- In the same node options, find and double click on “PARSE FUNCTION” and update “TEMPERATURE” to be the identifier of your variable, and update “BEAGLEBONE” to be the identifier of your Nimbus808 device.
- Next, select the Nimbus808 node to update and configure to your Nimbus808 account information.
- Assign the device label desired for the device. In this case, BeagleBone is the default.
Once you configure the Nimbus808 node parameters, Node-RED will display a view similar to the example below. To save the changes, press the Done button.
- Now it is time to deploy the flow and publish data to Nimbus808 cloud. For this, just press the Deploy button located at the upper right-hand side.
Receiving analog inputs
- From the Node-RED menu in the upper-right corner, select “Import” → “Clipboard”, then copy and paste the provided code. Access Node-RED only after you have fully completed the hardware setup described earlier.
[
    {
        "id": "992188769e6a6ffb",
        "type": "tab",
        "label": "Flow 3",
        "disabled": false,
        "info": "",
        "env": []
    },
    {
        "id": "c90718d6.019b08",
        "type": "function",
        "z": "992188769e6a6ffb",
        "name": "Parse Nimbus808 Value",
        "func": "var lastValue = msg.payload.value;\nmsg.payload = lastValue;\nreturn msg;",
        "outputs": 1,
        "timeout": "",
        "noerr": 0,
        "initialize": "",
        "finalize": "",
        "libs": [],
        "x": 630,
        "y": 380,
        "wires": [
            [
                "6f2c5ca.feeeea4",
                "68099677.872318"
            ]
        ]
    },
    {
        "id": "68099677.872318",
        "type": "debug",
        "z": "992188769e6a6ffb",
        "name": "",
        "active": false,
        "console": false,
        "complete": "false",
        "x": 850,
        "y": 420,
        "wires": []
    },
    {
        "id": "6f2c5ca.feeeea4",
        "type": "debug",
        "z": "992188769e6a6ffb",
        "name": "",
        "active": false,
        "console": false,
        "complete": "false",
        "x": 850,
        "y": 380,
        "wires": []
    },
    {
        "id": "5619ac27.0064b4",
        "type": "inject",
        "z": "992188769e6a6ffb",
        "name": "",
        "props": [
            {
                "p": "payload"
            },
            {
                "p": "topic",
                "vt": "str"
            }
        ],
        "repeat": "",
        "crontab": "",
        "once": true,
        "onceDelay": "",
        "topic": "",
        "payload": "{\"control\": 0}",
        "payloadType": "json",
        "x": 372,
        "y": 303.70001220703125,
        "wires": [
            [
                "04ec2bd576766797"
            ]
        ]
    },
    {
        "id": "04ec2bd576766797",
        "type": "mqtt out",
        "z": "992188769e6a6ffb",
        "name": "",
        "topic": "/BBB/devices/out",
        "qos": "1",
        "retain": "",
        "respTopic": "",
        "contentType": "",
        "userProps": "",
        "correl": "",
        "expiry": "",
        "broker": "4d0f46ac56dc4d74",
        "x": 610,
        "y": 300,
        "wires": []
    },
    {
        "id": "c09587cdd7d9eaae",
        "type": "mqtt in",
        "z": "992188769e6a6ffb",
        "name": "",
        "topic": "/BBB/devices/nimbus",
        "qos": "2",
        "datatype": "auto-detect",
        "broker": "4d0f46ac56dc4d74",
        "nl": false,
        "rap": true,
        "rh": 0,
        "inputs": 0,
        "x": 380,
        "y": 380,
        "wires": [
            [
                "c90718d6.019b08"
            ]
        ]
    },
    {
        "id": "4d0f46ac56dc4d74",
        "type": "mqtt-broker",
        "name": "Nimbus808",
        "broker": "Nimbus808.com",
        "port": "1883",
        "clientid": "",
        "autoConnect": true,
        "usetls": false,
        "protocolVersion": 4,
        "keepalive": 60,
        "cleansession": true,
        "autoUnsubscribe": true,
        "birthTopic": "",
        "birthQos": "0",
        "birthRetain": "false",
        "birthPayload": "",
        "birthMsg": {},
        "closeTopic": "",
        "closeQos": "0",
        "closeRetain": "false",
        "closePayload": "",
        "closeMsg": {},
        "willTopic": "",
        "willQos": "0",
        "willRetain": "false",
        "willPayload": "",
        "willMsg": {},
        "userProps": "",
        "sessionExpiry": ""
    }
]- Assign the Nimbus808 Broker URL in both Nimbus808 nodes where indicated.
- After placing the flow on the workspace, double-click the “Grove LED” node to open and adjust it as needed.
- Then, within the grove led node, locate the “PIN” and select the pin that you want and click “OK”.
- Now it is time to deploy the flow and publish data to Nimbus808 cloud. For this, just press the Deploy button located at the upper right-hand side.
Summary
The BeagleBone Green provides a streamlined solution for accessing BeagleBoard products. You can easily program the device and connect it to the server through Node-RED, optimizing it for sending and receiving data with Nimbus808. Following this guide, your BeagleBone device is now online and transmitting data to Nimbus808, enabling continued application development for monitoring and controlling systems or environments.
Have questions? Contact us for help