In this article we are connecting a ESP8266 device to Nimbus808 solution platform using MQTT.
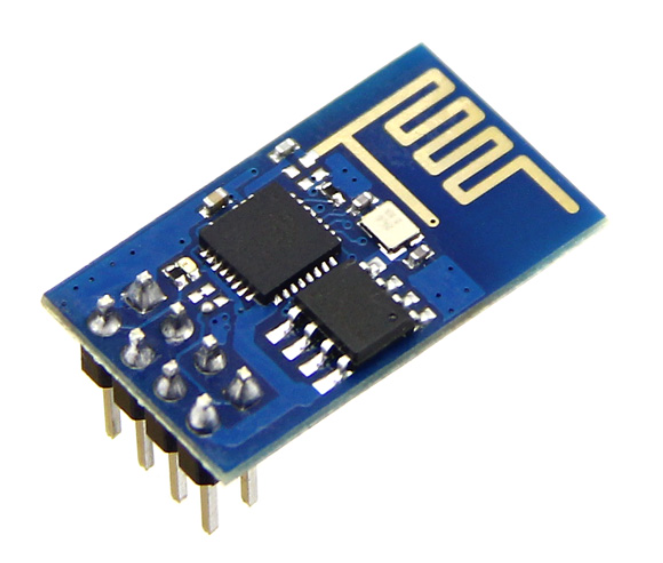
The ESP8266, developed by Espressif Systems, is a cost-effective Wi-Fi module. Its stability and feature set have made it widely adopted in the hardware community. It is fully programmable via the Arduino IDE.
Following this guide, you will be able to publish and subscribe data to and from Nimbus808 using the ESP8266 as a standalone module in just a few minutes.
Requirements:
- ESP8266 Module
- Arduino UNO, UARTbee or any UART to USB device
- Arduino IDE
- Jumper Wires
- Basic C++ Knowledge
Hardware Setup
To program the ESP8266 as a standalone module, you will need a UART-to-USB adapter, such as the UARTbee. Alternatively, you can program it via an Arduino board by connecting the Arduino RST pin to GND.
To begin, establish the connection between your programming device and the ESP8266 using the table below. First, identify the ESP8266 pinout to prevent potential hardware issues.
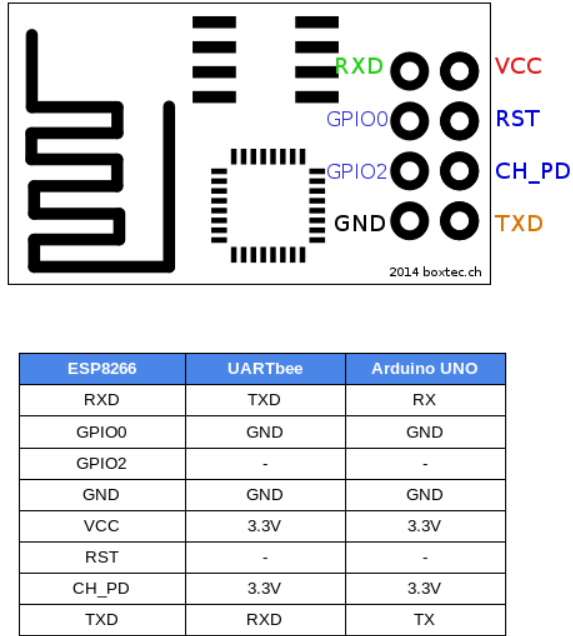
Important: When using an Arduino UNO to program the ESP8266, connect the Arduino RST pin to GND. Ensure that the ESP8266 VCC is supplied with 3.3V only, as higher voltages may damage the module.
- FAQs and Troubleshooting
A frequent issue encountered with the ESP8266 is the espccom_sync_failed error.
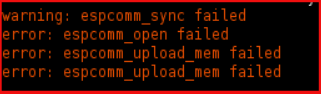
This error typically occurs when the RST pin is not connected to GND. To resolve it, please verify the following:
- If the jumper wire correctly connected and use the above Pinout table;
- Confirm that the Arduino RST is set to GND;
- Ensure that Generic ESP8266 Module is selected as the board in the Arduino IDE. For guidance on selecting the correct board, refer to Step 2 in the “Setting up the Arduino IDE” section below.
Setting up the Arduino IDE
- To work with the ESP8266 in the Arduino IDE, install the ESP8266 board via the preconfigured Arduino Board Manager.
- After installing the ESP8266 platform, select the specific ESP8266 device in the Arduino IDE. In this example, choose Generic ESP8266 Module via Tools > Board > Generic ESP8266 Module.
- Download and install Joel Gaehwiler’s MQTT library.
Sending and Receive Data to Nimbus808
- Open the Arduino IDE and paste the sample code below. Once you have pasted the code, you will need to assigned your unique Nimbus808 broker, SSID (Wi-Fi Name) and Password of the available network
#include <ESP8266WiFi.h>
#include <MQTT.h>

const char ssid[] = "";
const char pass[] = "";
# Put your WiFi information here

WiFiClient net;
MQTTClient client;

unsigned long lastMillis = 0;

void connect() {
  Serial.print("checking wifi...");
  while (WiFi.status() != WL_CONNECTED){
    Serial.print(".");
    delay(1000);
  }

  Serial.print("\nconnecting...");
  while (!client.connect("ESP8266")) {
    Serial.print(".");
    delay(1000);
  }

  Serial.println("\nconnected!");
}


void setup() {
  # put your setup code here, to run once:
  Serial.begin(115200);

  Serial.println("Hello, ESP8266!");
  WiFi.begin(ssid, pass);

  client.begin("test.mosquitto.org", 1883, net);
  # Put your Nimbus808 Broker information here

  connect();

  client.subscribe("/ESP8266/sub");
}

void loop() {
  # put your main code here, to run repeatedly:
  client.loop();
  delay(10); // this speeds up the simulation

  if (!client.connected()){
    connect();
  }

  if (millis() - lastMillis > 1000){
    lastMillis = millis();
    client.publish("/ESP8266/pub", "world");
  }
}- Verify your code in the Arduino IDE by clicking the “Check Mark” icon located in the top-left corner. This will compile and check your code for errors.
- Upload the code to your Generic ESP8266 Module by clicking the “Right-Arrow” icon located next to the Check Mark icon in the Arduino IDE.
- To verify device connectivity and monitor data transmission, open the Serial Monitor by clicking the “Magnifying Glass” icon in the top-right corner of the Arduino IDE. This displays the connectivity logs.
Note: If no response appears in the Serial Monitor, disconnect and reconnect the UART-to-USB device. Ensure the baud rate matches the value specified in your code (e.g., 115200).
- Confirm your data in Nimbus808. Now you should see the posted data in your Nimbus808 account, located the device called “ESP8266/pub”.
- Additionally, you should be able to send data back utilizing the “ESP8266/sub” topic.
Have questions? Contact us for help